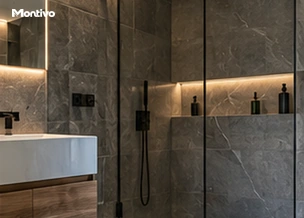
A bathroom can look perfectly finished while containing a vulnerable connection. Attractive tiles, matching grout and neat silicone lines do not reveal what has been installed behind the finish. That concealed area contains an important part of the protection against water penetration.
Buildwise explains that a tiled covering is not, by itself, watertight. Areas that are regularly wetted need suitable waterproofing behind the tiles to protect the substrate. [1] The issue is therefore not just the surface you see, but a continuous assembly with properly resolved connections.
Keep three functions separate
The substrate supports the finish. The waterproofing system limits water entering the protected areas. Tiles and grout form the visible service surface. A material may perform more than one function, but that must be established by the selected system.
A moisture-resistant board, for example, does not automatically make an entire shower wall waterproof. Board joints, fixings and connections still need attention. Ask how the complete wet area will be assembled, not just which board will be used. A product name without connection details is not yet a complete plan.
Distinguish the shower, the area around a bath and the rest of the room at the outset. Their exposure to water differs, so the appropriate solution may differ too.
Liquid waterproofing, sheet membranes and boards
Available approaches include liquid-applied systems, sheet membranes and suitable board-based solutions. The category alone does not make one universally better. Selection depends on the substrate, exposure, connections and manufacturer’s requirements.
The system also includes compatible tapes, pipe collars and bonding materials. A collar seals around a pipe penetration; a corner tape forms part of the connection between planes. Manufacturers such as Sika and Schlüter describe these components as parts of an integrated solution. [3][4] Mixing products without verification does not establish compatibility.
Record which system is intended and how its installation will be checked. Layer thickness, overlaps and drying periods are product-dependent. One universal value for every bathroom would be misleading.
Connections are the critical locations
The floor-to-wall junction, a niche, a pipe penetration and the drain bring different components together. Continuity of the waterproofing needs to be clear at each location. A neatly finished tiled corner alone does not prove this has been achieved.
The shower-tray connection also needs a suitable detail. Buildwise addresses the waterproof connection of a tray as a separate technical issue. [2] Ask which component provides that connection and how movement and the selected substrate are accommodated.
Plan fixings for shower screens, grab rails and accessories as well. A hole drilled later can penetrate previously installed waterproofing. Agree positions in advance and use a sealing method compatible with the system and the fixing concerned.
Waterproofing and drainage do different jobs
A waterproof layer does not automatically direct water to the drain. The shower-floor shape, its connection to the outlet and the available construction height must be considered together. A level-access shower therefore needs more preparation than a different tile layout.
Discuss the finished level relative to the adjoining floor and how water will remain within the shower area. Establish how the drain will be accessed for maintenance. The design must both keep water out of places where it does not belong and route it towards the intended outlet.
Check before the tiles conceal the work
Arrange a review point before waterproofing is covered. Photographs of corners, penetrations and drain connections are useful, together with product records and specified waiting periods. A photograph cannot prove every layer is correct, but it makes concealed details traceable.
Any testing should follow the selected system and project conditions. An improvised water test is not a substitute for correct construction. Also establish how damage during subsequent work will be prevented and repaired before it disappears from view.
Ask for this documentation as part of the agreed scope rather than as an afterthought at handover. It provides a clearer record if future maintenance or investigation becomes necessary.
When a leak or stain already exists
A damp patch next to a shower does not automatically identify the entry point. Investigate possible routes through plumbing, waste connections, junctions and the waterproofed area. That investigation should precede regrouting or adding silicone to visible edges.
Repairing a damaged system may require more than surface work. The extent depends on the established cause and access to its connections. It would therefore be premature to promise that an extra sealant bead or a coating over the tiles will be sufficient.
Does water-repellent grout replace waterproofing?
No. A property of the grout does not automatically make the entire bathroom assembly watertight. Substrate, waterproofing and connections must work together.
Do exposed sealant joints need maintenance?
Yes, include them in maintenance checks. However, maintaining a visible joint and providing reliable waterproofing behind it are separate matters.
Discuss the details that will disappear
When planning a bathroom renovation, ask about the waterproofing system and its connections, not just tiles and taps. Montivo can discuss the assembly and checks appropriate to the existing room and its intended use.
Sources and technical background
- Buildwise — Quel type d’étanchéité à l’eau poser sous un carrelage ? (2024-03.06)
- Buildwise — 3 aandachtspunten voor de waterdichte aansluiting van een douchebak (2022-03.07)
- Sika — Solutions for Wet Rooms
- Schlüter-Systems — Waterproofing
This article provides general considerations. Site assessment and the current requirements of the selected system determine the installation.